Sunday, December 1, 2013

matchbox ornaments


Today we  talking matchboxes.  I love these adorable little ornaments made for a dual purpose of gift box and ornament. They are fun to decorate and can be very addictive. 

Since I make several different kinds of matchboxes, I will make today's about fabric and jewelry covered matchbox ornaments. 


First, you need to take them apart and open the covers.  Cut a piece of fabric slightly larger than the cover.  Apply Mod Podge to cover then press the fabric down onto the glue. Lay under something heavy to insure a good bond of paper and fabric. Let dry completely. 

Fold fabric covered paper on crease lines, and hot glue back together. Make sure you are gluing the seam so it faces back toward the back. 


Cut a strip of complimentary fabric, lace or tulle and make a running stitch down the side. Pull it together to make a circle, embellish with a piece of jewelry, and glue to the top.  I like to use old lace and silk scraps to tie bows and other embellishments.

I buy a bunch of ornaments like this and pop the tops off to use for the hangers. These are handy for many different types of ornaments you can make.  Keep an eye out for these at the dollar store.


You can paint the insides of the boxes to match your fabric if you plan on placing something inside.  Another option is to wrap a trim around it completely if you don't plan on opening it. 

Remember to share this on line to be entered into the drawing for 12 of the ornaments featured over the next several weeks.  Post a comment here with a link back to where you shared it to be entered in the drawing. Every time you post it, you get another entry into the drawing.  Pass the word and increase your chances to win!


Saturday, November 30, 2013

Cone ornaments


I love cones.  I have a trick for you that you will love!

These cones were made with paper birthday party hats I bought at the dollar store. 

Deconstruct them, use Mod Podge to cover them with gift wrap, tissue, sheet music or patterned paper.  Mod Podge works best with paper because it doesn't cause the paper to wrinkle.  

Sometimes I trim the cones to make them smaller or slimmer.  The actual size of the party hat is great if you want to fill it with treats.


Make a focal to glue on the front. This one was a dollar store snowflake covered with German glass glitter. A strip of crepe paper folded and gathered with a running stitch into a circle with a double ruffle. A Christmas image cut into a circle and glued on with hot glue. 

Crepe paper ruffles glued to the top edge inside, and a double band of vintage tinsel around the top edge. Finish off with a purchased tassel on the bottom, poked through with an awl, and embellished with more tinsel at the end.

Enter to win by posting a comment here after sharing on a social networking site.

Friday, November 29, 2013

Paper Ornaments


First up is the die cut paper snowflake. Using a Sizzix machine and the Brenda Walton snowflake dies, I created 3 fan folded ornaments. I stacked them one on top of another and hot glued it all down. I like the sheet music for this project, but they would be lovely with any decorative paper, even gift wrap. I am thinking Mylar, or a pretty pearlized paper would be really beautiful.

I use these circles a lot in my ornaments. You will see them as a focal point or embellishment.  Ribbon, lace, tulle or crepe paper can be layered between the circles for added depth.  if it can be folded or gathered, I will use it somehow. 

Remember to enter a drawing for these ornaments.  A winner will be chosen on December 26th.  To enter please share this page on a social networking site and leave a comment here of where you shared it.  Link back here if you will.  You need to leave a comment on an ornament post to be entered.  I will be pulling the names from the posts.  Don't comment on FB or other social networking site, comment here to enter.


Thursday, November 14, 2013

Buckle Bracelet

I found this cool Marcasite buckle from the 1920's at a flea market.  This was a true find.  They are difficult and rare in a bargain box, and I swooped on it    Many times I will stack various findings on top and glue them down with E6000, then attach them to the buckle after I have made the bead chain and clasp.

First, you need some handy dandy bending pliers.  I got them from Gilding the Lily.  You squeeze the buckle in this tool a little bit at a time to create a bend the will fit naturally over the wrist.  Test it on your own wrist to make sure the curve is right.

Next, make your bead chain.  I find if I use strong steel pins, I don't need to wire wrap them.  If they are special beads, by all means, wire wrap them on to insure they will stay on.

Look at the bracelet for a good space to connect the bead chain.  If there is no space, you can make one with the riveting tool (also available at Gilding the Lily) or with a fine drill bit.  Sometimes you need to use a jump ring in the bracelet, and then attach the bead chain from there.

Create your focal assemblage with lace and broken jewelry parts.  I layered them all together into a pleasing configuration, and then glued it together.  Let it dry overnight, then glue the focal as one piece onto the buckle base in the desired position.  .

Measure your wrist, and make sure the bead chain is long enough to fit properly.  Add a clasp.  Now you have a lovely bracelet made from a buckle that is trendy and fashion forward.

Thursday, November 7, 2013

Footstool Revamp


  I saw these footstools for my daughter Kayleigh's room at a garage sale when we lived in Yorba Linda.  I didn't buy them, but went back at the end of the day and the woman GAVE them to me because she just wanted them gone.  We had planned on recovering them all along.  They are plastic and the tops were flaking and peeling off.  Kayleigh is 16 now, for those friends who have not seen her in a while.  She was reluctant to paint them.  She didn't see the vision.  She watched me paint a bunch of things for my closet office and was inspired to paint them after all.   She wanted to create a little seating area in hr room for friends.  I have seen these finished with faux fur and leather at TJ Maxx and Ross for $49 each.


We bought a zebra print robe that had a silky plush feel to it at a garage sale for $2.  Kayleigh removed the tops of the stools and spray painted the bottoms turquoise.  I cut the fabric to fit the tops and she stapled it on.  She reattached the tops and viola!  2 chic little stools, when placed together make a cute little sitting area in her room.


Total cost for this makeover:  $5.89 for the can of spray paint and robe.  Next time you see a piece of furniture at a yard sale that you like, but don't like the color, get it, and whip out the spray paint.  They look so dang cute, I want some for my room now too! I am so proud of my little DIY barganista.  She did a fantastic job on her first official adult project.  She is so amazing.

Thursday, October 31, 2013

Witches Brew


How many of you remember this show?  I used to LOVE this show.  My little niece Angelina is into cute kid scary stuff these days.  Frankenweenie, the Corpse Bride, Nightmare Before Christmas.  I remember making Witches brew for my kids class Halloween parties when they were little.  I always think of the line he says 5 drops of essence of terror, 5 drops of sinister sauce... whenever I make it with kids.

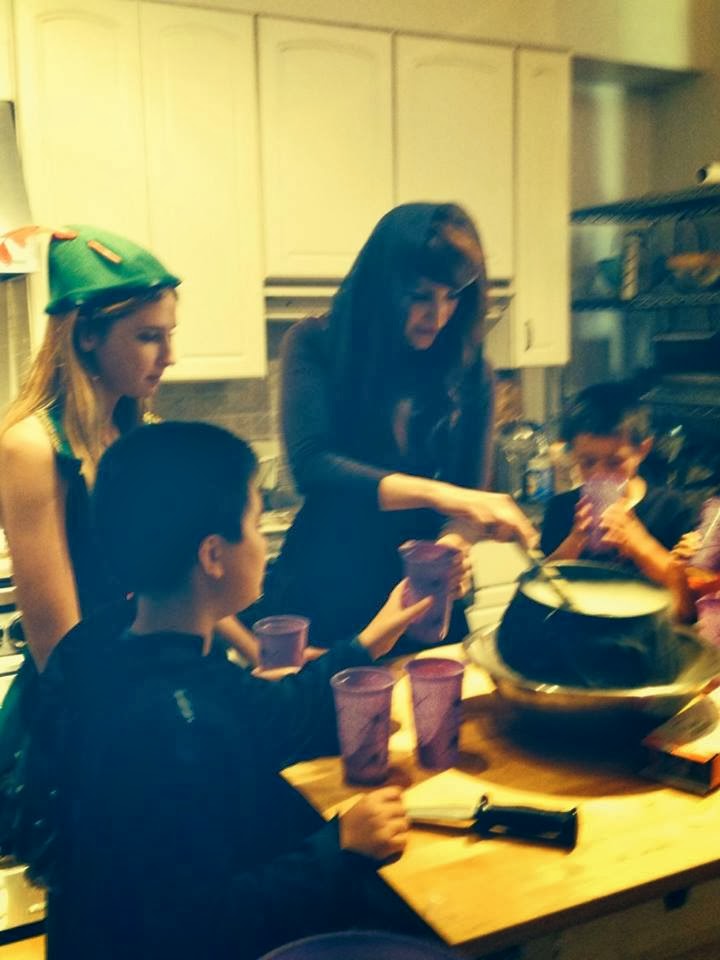
We have a potion kit we have collected through the years.  A small train case full of all kinds of things to put in the witches brew.  I fill fancy crystal salt and pepper shakers with cookie sprinkles of all kinds and colors.  Small perfume bottles and vials full of diluted food coloring.  The kids love to help make the potion... I give everyone a bottle that they can shake into the brew.  Here is Megan and Kayleigh making the potion at a birthday party for Eric, the little boy Megan is a nanny for. 


The basic recipe for the punch is:

1 carton of pineapple juice
1 carton of orange juice
1 litre of club soda
2 cans sprite or 7-up
1/3 container of pineapple or mango sherbert or sorbet

Blue food coloring in one of the potions jars turns it a yucky green.  Add gummy worms, and other gummy candy, gummy boogers, eyeballs, bats etc.  The kids are always pleasantly surprised at how good it tastes.  Looks gross but tastes good they told me.  The final touch is a large piece of dry ice to make it fog up.  It is always a hit with every kid.  It can be a fun punch for an adult party if you add Rum or Vodka...

Monday, October 28, 2013

Sabbatical and Holiday ornament giveaway

I am having surgery tomorrow and will be out of commission for a while. This is my 3rd rotator cuff surgery, and I have been waiting on this one for 4 years. I will be in a sling for several months, and unable to do much crafting. 

I have been preparing some fun holiday ideas for you in advance. Starting the day after Thanksgiving, I will be posting one Christmas ornament or decor item a day until Christmas. Check back often to see some incredible ornaments made by my friends and myself over the past several holidays. I know by my Pinterest following that you all like the handmade christmas stuff, and I promise you will not be disappointed.  They are all so lovely,   made with an eye for detail.  They are unique and many are created from recycled and reused items we normally throw away,  they will quickly become favorites on Pinterest.  If you follow me and help spread the word on social media, I will enter your name into a drawing on Christmas for a prize of 12 ornaments featured on my blog. 

Simply post a comment here with a link back to your blog,  Facebook, Twitter or Instagram post to be entered.  Super simple, awesome prize. 

Looking forward to a fun, slingin' holiday season,

Thursday, October 24, 2013

Closet Conversion to Art Studio


We live in a teeny tiny house with a huge backyard.  Ideally, I would have a huge studio for all of my art supplies out back, overlooking the creek,, but unfortunately, this is not to be at this time in our lives.  So I just make do with what I have for now.

 There are two closets in my room.  A huge one that covers one wall, and this little one that just sat unused, with a hamper and miscellaneous junk piled up inside.  It has no doors, and was a real eyesore.   


I had a pair of rolling file cabinets I picked up at a yerd sale for $10.  They have 2 small drawers on the top and a file cabinet drawer on the bottom.  This desk will have to double as a studio and home office space. I spray painted the front and one side of the cabinets (the tops and other side won't be seen and it saved on paint) and started my transformation. I sprayed a bunch of mismatched pieces that I had been using for my tools, all with the same aqua color.


 A piece of malamine from Home depot cut to the length of the inside width of the closet topped the file cabinets.  2 adjustible wire shelves from the closet organizing department at Home Depot (mine were from a garage sale) were screwed to the wall by my darling hubby.  This allows 2 shelves total for holding my various bead boxes and train cases full of supplies.  I took the top shelf out and plan on adding another 2 wire shelves above the wooden support piece.  (I can't remove it because we rent and I don't want to have to redo it when we leave.)


The adjustable bar comes down the wall longer than I would like, so my hubs drilled a screw through the frame of a bulletin board to secure it over the bars.  I painted the frame of the board and spray glued a pretty gift wrap paper on the cork surface.


In the corner, I put a little plastic vintage drawer set with an adjustable reading lamp for extra light.  Beside the lamp on the wall is a necktie holder (also from the organization dept. at HD) to hang all of my bead chain,  On the right corner, I have a tool turnabout from Pampered Chef with all of my necessary tools.  The drawers of the file cabinets have art supplies in the top 2 drawers, and all of our bills and household accounting stuff in the bottom.


Now I can sit and work in the evenings while Paskie watches TV, and I also have an organized place to pay bills and do paperwork.

I have to say, this is a very easy and convenient way to organize your art supplies.  I find this holds a LOT of stuff in a very small place,  If you have an unused closet in your home that you can convert, I would highly recommend it.  If you don't have a closet, you can do the same thing with an old Armoire.  You are only limited by your imagination.  I love my new space, and sit at night and stare at it.  So happy to be organized and have a pretty space to work in.

This entire project was done with things I have collected at garage sales and hoarded in the garage. Here is the breakdown:

File Cabinets                $10  garage sale find
Melamine Scrap           $10 Home Depot
Wire Shelving                $5  garage sale find
Lamp                           $2   garage sale find
drawer sets                   $3   garage sale find
tool turn about               $1  garage sale find
necktie holder                $1  Garage sale find
bulletin board                 0    free on sidewalk
2 cans spray paint         $7   Home depot
roll gift wrap                  $1   Dollar Tree

If you have done a closet makeover, please post a link here.  I love to see what other people do with their creative spaces.


Thursday, October 17, 2013

Graduated size bead redo

We have all seen these beads.. They are from the 1950's, remind me of Lucy Ricardo, and are usually made of plastic or Lucite.  They have a lovely tigers eye glow to them, and they are really pretty when mixed with other beads and rhinestone rondelles.  When you combine them together and make dangles, they look really contemporary and chic.


Sorry for the blurry photo.  I didn't take one before I deconstructed these (I must remember to photograph everything when I bring it home) so I had to zoom in on a group shot photo from my last posting. 


1. Take a piece of chain and cut it to the desired length of the necklace.  I find choker length works best for this...
2. deconstruct the necklace.  They are usually knotted in between each bead (that's how you can tell a good quality necklace)
3. clean them with warm water and dish detergent if they have a greasy feel to them.
4. Using head or eye pins, create dangles by stacking them on a pin.  If you use eye pins, you might want to dangle a little rhinestone or teeny bead for a little extra sparkle.
5. add a toggle clasp to the chain.
6. Hang chain on mannequin or necklace easel board from Michaels, and start attaching the bead dangles.
7. I count links and put the largest bead in the bottom at the center of the chain, then I count over and  add the next size down, making a symmetrical balance between the beads. 


On the pink necklace I chained up little beads and hung strands of 3 beads in between all the other beads.  I decided not to do it on the blue one.  I could have dangled rhinestone chain in between for more sparkle, but I was out of shiny silver rhinestone chain, so I added the little Swarovski bicones at the end of all the big beads for a little sparkly shimmer.  They swing and catch the light beautifully.  

I love how they look.  On trend, and very updated compared to the plain I Love Lucy style they were before. 


Thursday, October 10, 2013

Fleur du Lys 3 piece set


These Fleur du lys medallions are from a chain belt I bought at the Rose Bowl flea last spring.   I often use belts that I deconstruct for focals.  This set seemed to need the shades of gray and silver to go with the vintage distressed look of the medallions.  Here is how I made this set. (Sorry I don't have photos of the pieces before deconstructing them.)

1. Deconstruct the belt.
2. Deconstructed a green, black and smoky quarts necklace and rework the beads with bead caps. 
3.Dip all shiny silver components in Jax darkener to make everything look aged.
4. Create 2 matching bead strands 10 inches long (each)
5. Reserve some beads for the earrings and bracelet.
6. Attach toggle clasp to ends of 10 inch bead strands and connect to medallion to make necklace.
7. Attach extra bead strands on to second medallion to form bracelet sides as desired.  Add toggle clasp.
8. Chain 3 coordinating beads together and add a small crystal dangle, add earring wire.

Again, this is a really easy basic set to make.  You could do something similar with a brooch and earring set.  Use the brooch as the necklace focal and a smaller scale earring for the bracelet.


Thursday, October 3, 2013

Doll Jewelry display

I needed a jewelry display for the show last weekend. I purchased a bunch of old dolls at the Long Beach flea back in April and decided to get busy and make them.  this is inspired by Lisa Loria's Bling Babies. I looked on her blog and Pinterest boards for a tutorial or on line instruction guide by her with no luck.  Armed with imagination and a vague idea of what I wanted, I embarked on my journey. 


I knew I wanted something tall. I found this gold brass candlestick at a garage sale and sprayed it with high gloss white.  It is a strong heavy base and perfect for what I needed.  You need a heavy weighted bottom to hold all the jewelry.  I had a lampshade that would be perfect. ( I knew there was a reason for hauling it back and fourth in my 2 moves to OC) I removed the old yucky plastic from the shade and painted it pale blue, more to prevent further rust than anything else.  


I used a kitchen knife to cut the pelvis off of the doll. If you are using a composition doll, you may need to use a hacksaw or a table saw if you aren't scared of power tools.


This little doll's hair was seriously jacked up. Like the one above more or less. I washed her hair and used about 1/3 cup of fabric softener to comb it smooth.  Fabric softener is perfect for synthetic doll hair (another Pinterest tip) It took a while, but it came out really silky and soft. Just be patient and pour the softener on the hair a little at a time, working out small sections of tangles bit by bit.  Now she looks like my beautiful sister in law Krissy.


I cut chicken wire to cover the shade in the shape of the panels and then tied it on with twill tape and seam binding. I covered all of this with the selvage edge of the fabric that had a cool sparkly fringe look to it.


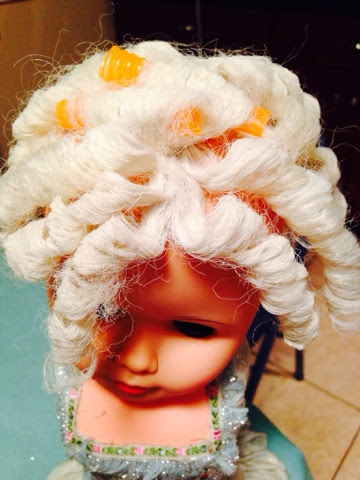
To style the hair, get some Halloween straws from the dollar  store, (they are larger than traditional straws.) Cut them into sections,, and roll the hair.  Since I wanted Marie Antoinette sausage curls, I wound the hair on in a vertical fashion and pushed a straight pin through the scalp to hold it in place. Synthetic doll hair is not easy to curl. I dunked the head in a bowl of boiling water for 3 minutes, then in ice water for 2 minutes. And let it air dry. The hair got kind of fried, but it was still workable. I would do less time in the hot water next time.


When removing the curls, remove the pin and pull the straw straight down. If you unroll it any other way, you will not have sausage curls. I recommend leaving the hair for last. I kept it in curlers until I had attached the bust to a wood circle and covered it. It prevents it from getting messed up. 

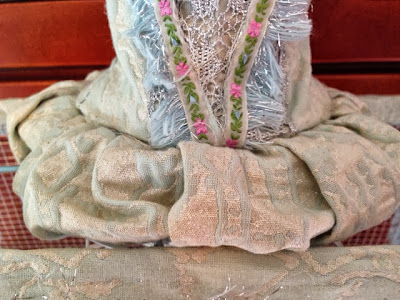
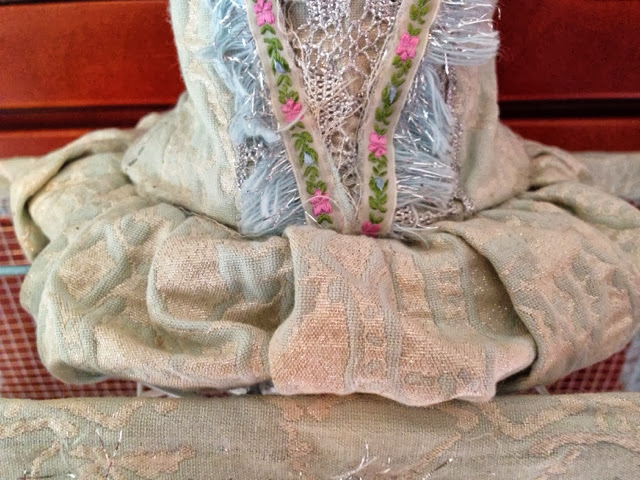
My dad helped me cut a circle the size I needed for the top of the candlestick. He drilled her to the wood base, and then drilled holes for me to run wires through so i could secure her to the top, yet make her removable for transporting. It needed to be secure to hold the weight of all the jewelry.  Using the bodice to an American Girl dress as a pattern, I modified it to fit this dolls body, sewed the shoulders and side seams, and glued it down her back. I cut a length af fabric twice the circumference of the circle, pinch pleated carthige pleats that would lay flat, then glued the skirt to the waist.


Before gluing the underside, I ran the wire through the pre drilled holes. The bodice bottom was turned under and glued down to hide the pleats and give it a more finished look. On the under side, I glued down the seam first, then went across the board and glued the opposite side, avoiding the wires, making sure they stayed exposed. I continued around in quarter turn increments until I had it glued down completely. 


I took a piece of doweling, wrapped quilt batting around it and then sewed a long tube out of matching fabric.  I hot glued the ends down to the doweling. 


I looked on Google images for Marie Antoinette and saw her hair and hat styles. I made a simple hat with a teardrop shaped piece of fabric. I trimmed it out with the same trim as the shade and doll bodice.  I gathered a length of the silver lace to make a simple rosette, and just glued down other flowers and a bow. This is the part Lisa Loria is good at. She covers them completely with jewelry. I chose not to do that with this one, because a really wanted the Marie Antoinette look, and I am in love with this fabric, plus I didn't want to knock off her idea completely. I wanted hers to be the inspiration for it, with my own twist.

I am really happy with how she turned out. I met Lisa at the show, and told her about making it, and planning to blog it.  She was very sweet and generous. She complimented me on mine, she liked the chicken wire shade for earrings. She told me someone asked her if she had made it. I take that as a compliment that someone even thought it MIGHT have been made by her.  She says she doesn't make them very often anymore.  Like many artists, you do something for a while, and your work evolves and you move on to different things.  If you do ever get a chance to take a class with her, do it... she is just delightful!  I wish I had known all her tips and tricks while trying to figure out this whole project.  It is not a simple one by any means,  It was completed a few hours at a time over a week.  Drying of paint and doll hair took some of it up.  I would say you could probably finish it in a weekend, Friday nite thru Sunday.  I am going to Alameda Flea on Sunday to try to find some more dolls at a good price to make more.  I love how little space they take up, yet how much they actually hold.

I think she is lovely.  The only thing she needs now is her own little miniature pearl necklace.  I am off to make her one now...