Friday, December 7, 2012

Box Locket Pendant


These little keepsake pandants are super easy to make, and look vintage and trendy.  I got these plain metal boxes from Nancy at Gilding the Lily.  I soaked them in the Jax brown darkener, buffed them up, glued a pendant bail on the back with E6000,


I finished it off with a vintage earring.  Glue the earring to the front with E6000.  They open like a book and make a great keepsake pendant or ornament with a special photo inside.

If you want to try an alternative to the little boxes, (you CAN get them from Nancy at her on line store) you can do the same thing with a mini altoids tin or any little tin.  I have used vintage aspirin tins too..  Torch it over a gas flame or on the BBQ until blackened.  Drill a hole at the top back side, make a wire loop to hold a chain.  Then embellish the front as desired.  These are addicting to make.  Make some beaded chains to show off your piece and give it a more dressed up look.

Thursday, December 6, 2012

Easy Apron

Have you ever seen  a childs dress in a thrift store that you just LOVED but it was too small, or you just loved the fabric and wished they made it in your size?  ? Ever thought of buying it and making it into an apron instead?


First cut down the back seam.


Next cut the bodice off.  Make sure to leave the top of the waistband above the tie so you can turn it under.  Extend the tie across the sides, stitch the waistband (the turned under part where you cut the bodice off)  to the tie band


This apron would look adorable over a black or white full skirted dress on a little girl.  It is a lovely holiday apron for an adult.  When I shop for used clothes, I look at the fabrics.  Is it an unusual pattern or vintage print I can use for something else?  Take a second look at things.  You can make a lot of things out of old skirts, baby dresses, little girl dresses, prom dresses etc.  This dress was a 6x/  Childrens dresses have a lot of fabric and can be versitile.  A chiffon skirt could be a dresser scarf or table runner.  A lace skirt could be a lanpshade. 

Wednesday, December 5, 2012

Formica sample luggage tags


This project is a fun one for kids. A great school craft for kids to make for a parent gift. I made luggage tags, but you can also put a school picture on the front, write the year and glitter the back. Every year I made some ornaments with my kids. They each have a box of their own with ornaments they have made over the years
 
 
I got a bag of these formica samples from my friend RC the dumpster diva a while back. I have been making all kinds of cool things with them... my most current obsession is luggage tags. The larger ones work best, but the small ones are cool too.

 
I take a graphic, image, paper scrap etc... and glue it down to the tile with Mod Podge. Scraping another one across the surface of the image to press all air bubbles out... Sometimes I layer a background paper, then an image and then some embellishments on top.


  On the opposite side of the tag I glue down the name and address side of the luggage tag on coordinating papers.  I make sure to include my email address and cell number as well as my physical address.  When everything is on that I want... I paint on a thin layer of Ice resin to give it a waterproof coating.  Do one side, let it dry overnight, and then coat the other side.  If you don't want to use resin, there are many options for coating... a few coats of mod podge with sanding in between coats gives a nice finish... also you can use crystal laquer, or clear acrylic spray... Clear nail polish will work too.  I have also used UTEE (ultra thick embossing enamel) by coating the surface with clear ink, pouring on the CLEAR UTEE granules and heating it up with a heat gun.  Just be careful, if you hold ther heat gun too close to the formica tile for too long, it will melt the tile.

When you are finished, tie a piece of grosgrain ribbon, fabric or tulle like I used here, through the hole and attach to your luggage.  Ta daa.... super cute personalized luggage tags.  These are a fun gift for a wedding shower...  Many couples register for honeymoons now, you can give them the luggage tags with a card telling them what you purchased for them on their trip...  They are great graduation gifts in an envelope with money, or a baby shower gift for mommy's overnight bag...

Tuesday, December 4, 2012

German Glass Glitter

I bought a bag full of plastic stars at the Torrance flea market.  I glittered them up with silver glass glitter, and then made little tulle circles, glued a vintage earring in the middle and hot glued the whole thing to a star.  I LOVE how they turned out.


You can find glass glitter on line at Meyers Imports. It is pricey, but worth every penny.  The sparkle you get from glass glitter is different than regular glitter from Michaels.  It ages and tarnishes over time for a cool vintage look.  It is NOT for kids though.  It is made from vintage mirror shards, and is not safe for children. 

I have been glittering up everything I can find.  It really is true... everything looks better with a little glitter.  Here is a merry Christmas sign I bought at the Dollar Tree and glittered.  It is going on a wreath I am making for a future post.  I have glittered up old ugly ornaments, bottle brush trees, candle glasses, Funky plastic figurines from the 70's...  Dig out the glitter and see what you can sparkle up this season.


Monday, December 3, 2012

Eggshell Ornamants


I do a lot of cooking with eggs... I try to blow out the eggs whenever I can throughout the year and save them up for kid craft projects. They are fun, easy and turn out really beautiful. 

To blow out a shell, I make a thin hole in the top point of the egg, and a larger one at the bottom. A sharp steak knife will do the trick. Once you have the holes made, stick a bamboo skewer in the larger bottom hole and scramble it up a bit. This makes it easier to blow out withough hurting your cheeks and making your ears explode.

Rinse the shells out and let dry thoroughly. When completely dry, glue a piece of tissue paper over the bottom hole. If it indents a bit, you can fill it with white spackle or artists modeling paste. When spackle is dry, sand smooth with a fine grit sandpaper. Dig out your christmas ornaments, and find the itty bitty christmas balls that you bought at the dollor store. Many times the tops of those ornaments are silver plastic and they pop off easily. Hot glue it to the top of your egg, add a string or hook to hold it. You can paint the eggs any color you choose with acrylic paint. We usually leave them white, and cover them with glue and then roll them in glitter. I don't know what it is about glitter, but it just makes everything more beautiful.

You can embellish them with beautiful trims and buttons and rhinestones if you like. My Christmas tree is covered with the ones my kids have made over the years, all white with different types of white or irridescent glitter.  Sometimes, I cover one in gold glitter and stick money folded up inside. I hide it in the tree and the kid who finds it gets to keep the money. Just be careful they don't knock your tree over trying to find it.

Another use for them is on an easter egg tree. Cover them with pastel paint and glitter for a festive easter tree.  I have done these with kids many times and they are always a hit...  The glitter makes them so beautiful.  Even little boys love this project.  Try it out and let me know how it went.  I would love to see photos of your own glitter egg projects...

*** Some life saving glitter tips..  I glue in one station, and pour the glitter in another area on to a piece of printer paper.  This way you can pour it back into your container and recycle it when you are finished.  Use small styrofoam meat trays when working with kids, but dump it out onto paper when you are finished so you can pour it back in.  Tried pouring from the tray once and had a glitter disaster.

Sunday, December 2, 2012

Tree Skirt


I am decking the halls in non traditional colors this year.  Pink, pale green and silver.  Today we are starting with a tree skirt.  I made this from a ladies skirt I found at the Thrift Store...  Super easy and so cute!  When shopping for a skirt, look for one that is really full  It needs to make a circle when finished.

Remove the zipper and open that entire seam.  Remove the waistband.  Finish off the opening seam.   You can stitch it down flat if you want a finished look.  Or use iron on hemming tape to finish the ends.  Then turn the skirt over so the underside is up.  Mark panels, and take little darts all around the panel seams until the skirt lies completely flat.

I chose to sew all the seams closed.  I place the skirt over the stand and then assemble the tree afterward.  So I just need the hole for the tree trunk. You can use ties or Velcro to close the finished seam.  Or leave it open and just wrap and tuck.  It is all your own preference.

I opted to leave mine unfinished.  I may repurpose this into stockings next year, and I didn't want a stitched band around the hole.  I do have the waistband fabric, which I can put around if I want... but honestly, that part is never seen anyway, so I took the easy way out,

Now I just need to find a cheap tree and start decking next week when we move into the new place. Check back this week to see all the ornaments I am making for my pink and green tree.


Saturday, December 1, 2012

Simple Advent Calender

 
This holiday is a tight one for many people.  I am kicking off the 25 days to Christmas with ideas for creative gift ideas that won't break the budget.  Most of these crafts can be made for under $5.  My goal is to give you some ideas for cute gifts, home decor and fun craft times with the kids in your life. 

I used to make these when my kids were small.  They loved taking turns on who got the candy, and I always got the last one, because it was an uneven number.  Lets start off the 25 days till Christmas by making an advent calender for the kids in your life.

 
 I made a tree with a green wool sweater I bought from the thrift store for $1.


Cut pockets from the left over fabric and hot glue to the tree shape.

 
  I bought felt at Michaels for .39 cents to make the packages.  Decorate them with tulle and christmas tinsel and garland scraps you have lying around the house.  You can be as elaborate as you like with the package decor.  Glue them to each pocket and fill with a fun sized candy bar. 

Viola!  I now have a simple easy advent calender... and it only cost me $1.39

Here is a site I found on Pinterest with a bunch of advent calender ideas.  Please post a link to a photo of one you have made or seen on line and would like to share. 

Thursday, November 22, 2012

Thankful fo my Orchid Whisperer


My hubby is obsessed with Orchids.  Sometimes it is kind of funny, how excited he gets over a new flower spike or psudo bulb.  It is really cute, he acts like a proud papa.  I guess you have to be an orchid lover to get it.  I liken it to my excitement over a vintage rosary or some cool funky rusty thing.  He is so great and supportive of me and my passions... I like to go with him to the orchid shows and photograph the flowers for him.  Here are some photos I took at a few shows over the past few months...I am a lucky gal, who is thankful to have a house full of beautiful blooming orchids and african violets that others can't usually grow...  Thanks to the love and care of my wonderful hubby.

 Today, on Thanksgiving, I am taking time to count the things I am thankful for.  My kids, of course.  My parents and my brothers Chip and Joe, my sister in law Krissy, my friends all over the world, my cats, my health, a car that runs, a new home with a fabulous kitchen and backyard.... but most of all, above all else.. I am thankful for my husband.

Eight years ago today I stood on a beach in Maui and married my best friend.  We giggled, and laughed and cried, as the preacher blessed us with an ancient Hawaiian wedding prayer and wished us a lifetime of love and happiness.  I still get goosebumps when he tells me he loves me.  I love him more today that I did then,  Every day gets better. Our live has been one long roller coaster ride...  We have been through it... some of the worst things life can throw at you...and come out the other side still together and loving each other.  I am a lucky woman, and I am so thankful for him.

I will be taking a brief sabbatical from blogging for the next 10 days as we move into our new home,... I will be back in December with a post a day until Christmas!  I have been working like a little elf on all kinds of cool things for the holiday season.  So check back daily for kid crafts, home decor ideas, recipes and other tips and tricks to help you have a fun and frugal holiday season.

Big holiday hugs to you all
with much love
Karan


Tuesday, November 20, 2012

Getting ready for the holidays


I am so excited for the holidays this year.  Not for any particular reason, but for a lot of reasons.  We are starting a lot of new things in December.  My hubby has a new job he starts after Thanksgiving.  We are moving into a new house December 1st.  I am back home in Northern California where all my family and childhood friends are.  My kids are all close by for Christmas baking and holiday crafting. 

So what if we don't have furniture.  Who cares that we will be moving and unpacking at the height of the holiday preparation time.  We are all here....  We get to be together.  We don't have to be frantic and bring everything with us in the car from OC. 

Everything we need can be found at a garage sale or thrift store.  I am on the hunt for a pre lit tree, a sofa or two and queen beds.  Hopefully I will find them quickly and inexpensively.  We have time.  I am excited to have a studio space again.  Pascual is thrilled to get a greenhouse and chickens... Kayleigh is happy to have a room again.  Life is good, we are happy.

I am working on being in the moment.  Enjoying every single day for what it is.  A gift.  The present.  The ducks on the pond every day when we go for our walks.  My sister in law Krissy, my friend, walking partner and therapist.  Our cozy little apartment that we have quickly ourgrown.  My new little nephew due to be born in March.  Our nieces Breanna and Adrianna, and nephews Diego and Pablo that remind us how fun it is to have kids around at Christmas...

I am off to prepare for Thanksgiving.  Happy Turkey day to you.  May yours be filled with love, laughter and lots of great food.

Thursday, November 15, 2012

Paris Flea Market


I have been telling everyone about the shop I have space in called Paris Flea Market.  It is a great shop that is open once a month for 4 days.  They sell all kinds of cool vintage and not so vintage things, From furniture to vintage clothes to anything you can use in your house.  It is like your favorite antique store with Junque store pricing.  Tons of beautiful thisng at great prices.  Their sale days are the first Thursday, Friday Saturday and Sunday of every month.  their website is here.  Their sister shop A Room With a Past in Walnut creek has their sales on the 3rd Thursday thru Friday of every month.  There are always lines to get in on Thursday nights.  The stuff is wiped out by Sunday afternoon so shop early for the best stuff.  Room is open this weekend, starting tonight.  Paris Flea Market will be open the first weekend in December.   If you are looking for some cool, unique funky vintage things for christmas gifts... this is the place to shop.   

Tuesday, November 13, 2012

making a patio set

When we moved from Southern California, my hubby said to give away or sell everything and we would get new stuff....  well... it didn't really happen like that.  I gave away and sold a lot of really great furniture pieces, some of which I really miss and regret getting rid of.  Our teeny apartment has no space for a table and chairs... so we really needed a patio set...  so what is a resourceful gal with limited funds to do?  Break out the paint and go to town... 

I am a big fan of the Hazardous Waste Materials Collection Facility in CoCoCounty.  They always have a TON of paint... I found the best day to go is Saturday afternoon.  They get a lot of donations on saturdays.  I got 5 gallons of Kilz primer, 5 gallons of white satin latex interior exterior paint, 6 gallons of various white, blue and green paints, some pre mixed mastic for mosaics, faux patina paint, 20 quarts of various shades of white cream and blue.  I mix all the whites together, all the creams together and the blues I mix with whites and greens to get soft blues and aquas... and the best part of all... it is 100% FREE!!! you can only make one stop there a day for stuff, but you can take as much as you want!  Whenever I go to the bay area with my car, I stop there and get paint.  So see if you have one in your area.  If your community recycles these things like they should, there should be a lot to choose from.  I can say the one here in OC is pretty bad.  Not much stuff.  I think people don't recycle down here as much as they do in Northern California...

I had these 4 wooden folding chairs that my mom gave me.  They were really weathered, so I painted them a couple years ago with a bright green.  The color faded, and I really loved it.  Then I was at the goodwill and found 4 more folding chairs in really great shape for 6.99 each.  So I got all, 4.  I painted them all apple green, and I must say they turned out really cute!


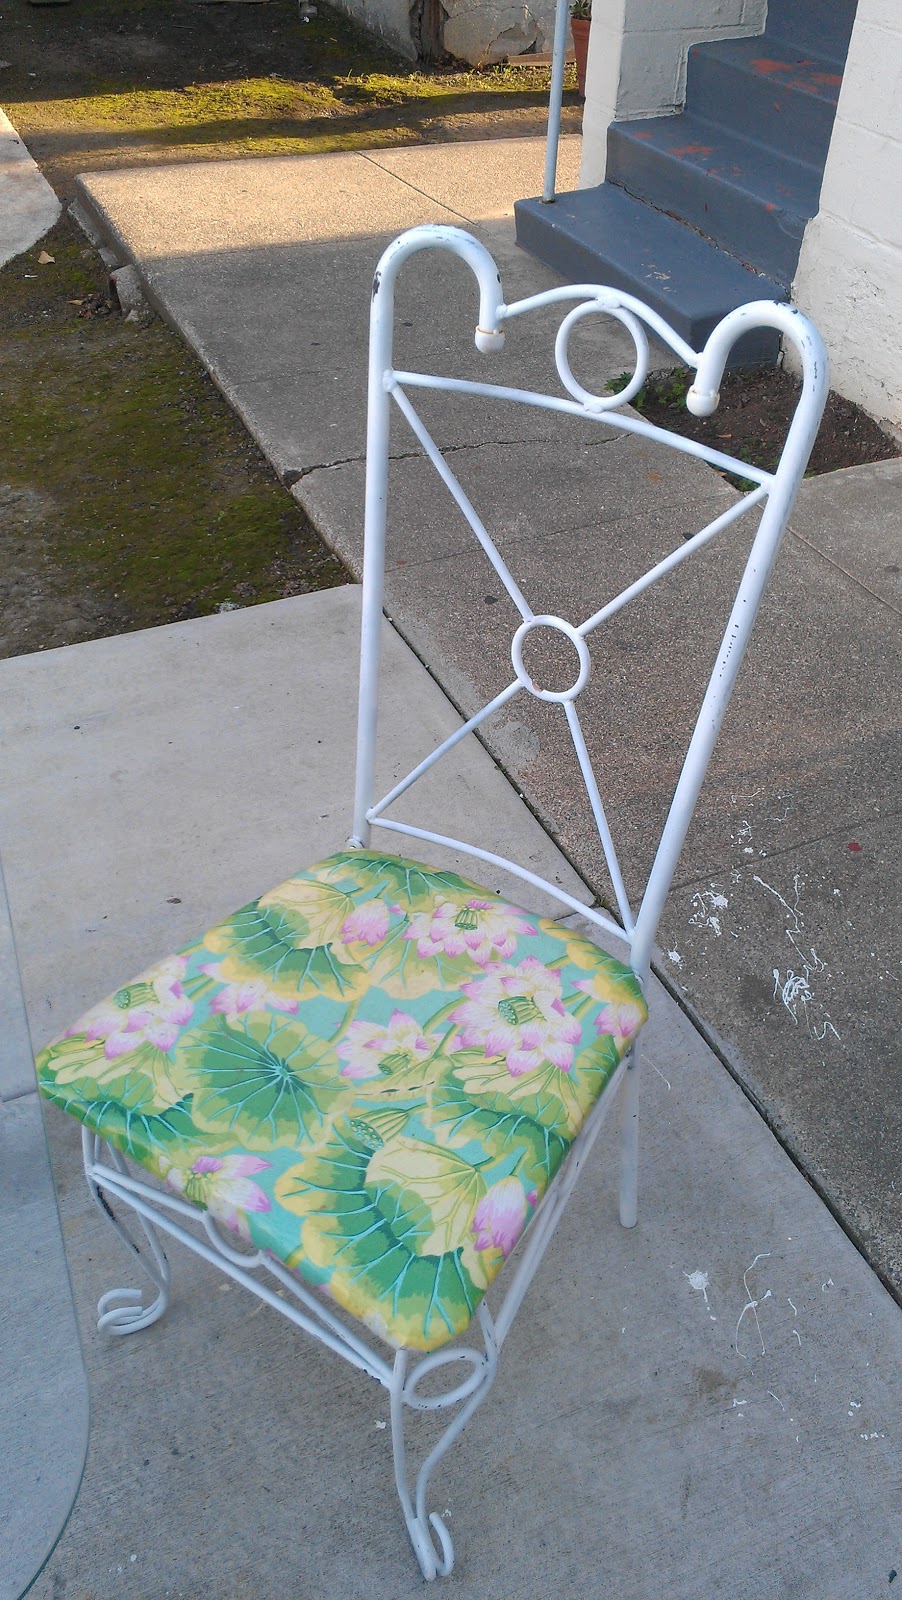
I had a table and chairs that was silver and gold.  I spray painted it white and recovered the seats.  A simple process where you turn the chair over, unscrew the seat board, remove the existing fabric and replace with something new.  I saved the cushions, and just recovered it all, stapled it in place with a staple gun and reattached the seats to the chairs.  The fabric I used was a plastic coated fabric that is waterproof for the more wet outdoor weather of northern california.  I had 5 chairs, so I mixed in 4 green folding chairs for a table for 8.  I like the ecclectic look of the mixed wood chairs with the metal ones.  I also love the bright spring colors.  Even in fall in winter the colors are so cheerful and reming me of the warmer weather that I love. 


I would love to hear about a patio or garden makeover project you have done.  Please post a comment and add a link to your blog with some photos.  I love to see what other people come up with.